

Building your first Web app with Flask
rendering templates, view functions, conditional statements, dictionaries...


Good day ardent readers, it's been a while since my last blog and I'm sure y'all have been developing yourselves to become better and also learning new stuff
Well, I have been doing just that! Building on my Python programming background and experience with using Django, a powerful python framework for building and deploying web apps, I decided to learn Flask
Just want the code? - https://github.com/starlingvibes/flask-webapp
So what is Flask?
 Flask is a python framework just like Django but it's stand-out feature is it's ability in
letting the developers take the driver's seat and have full control of their applications.
Flask is a python framework just like Django but it's stand-out feature is it's ability in
letting the developers take the driver's seat and have full control of their applications.
Do you like relational databases? Or maybe you prefer a NoSQL database? Or probably your own homegrown database engine?
No problems, Flask allows you choose the components of your application, no questions asked!
Installing Flask
The most convenient way of installing Flask is via a virtual environment. A virtual
environment is a copy of the Python interpreter into which you can install packages
privately without affecting the global Python interpreter installed in your system
To create a virtual environment, run:
python3 -m venv *env-name*
where env-name is the name of the virtual environment you'd like to create
Make sure your current directory is set to that of your project, and then run this command:
python3 -m venv venv
After the command completes, voila! you will have a subdirectory with a brand-new
virtual environment that contains a Python interpreter for exclusive use by this project
Activating the virtual environment
To activate the venv on a Linux or MacOs computer:
source venv/bin/activate
If you're on Windows:
venv\Scripts\activate
NB: If you run into issues using the above command on Windows, escape the backslash like so:
venv\\Scripts\\activate
Installing python packages with pip
Once you've activated the virtual environment, it's time to install Flask by running the following command
python3 -m pip install flask
On executing this command, pip will install Flask and all of its dependencies. You can list these dependencies by using the python3 -m pip freeze command
Flask application structure
Let's explore the different parts of a Flask application
Initialization
All Flask applications must create an application instance which is an object of the Flask class.
This instance is usually created as follows:
from flask import Flask
app = Flask(__name__)
The name argument passed to the Flask class is used to determine the location of the application, which in turn allows it to locate other files that are part of the application, such as images and templates
Routes and View Functions
A route is an association between a URL and the function that handles it. This is important because Flask needs to know what code to run for each URL requested. The most convenient way to define a route is through the app.route decorator like so:
@app.route('/')
def index():
    return '<h1>Hello World!</h1>'
This registers the index() function as the handler for the application's root URL.
These kinds of functions are called view functions. If the application is deployed on a
server associated with www.example.com domain name, then navigating to http://www.example.com/ in your browser would trigger index() to run on the server
Since we'd be rendering some sort of user defined variable in the project as we'll see later, let's take a look at an example of a route that has a dynamic component
@app.route('/user/<name>')
def user(name):
    return '<h1>Hello, {}!</h1>'.format(name)
The portion of the route URL enclosed in angle brackets is the dynamic part and it's passed as an argument when the view function is invoked
Piecing it together
Having looked at the different parts of a Flask web application, let's piece it together
from flask import Flask
app = Flask(__name__)

@app.route('/')
def index():
    return '<h1>My first application!</h1>'

if __name__ == "__main__":
    app.run(debug=True)
The last two lines allow us run the application as a python script and setting the value of debug to True saves us the hassle of restarting our server whenever we make a change
Development web server
To start the application, make sure the virtual environment is activates and has Flask installed in it.
Once that is satisfied, run the web server as follows:
python3 *app-name*.py where app-name is the name of your Python file
Once the server starts up, it goes into a loop that accepts requests and services them. This loop
continues until you stop the application by pressing Ctrl+C.
With the server running, open your web browser and type localhost:5000/ in the address bar
Basic Application Setup
You've done a good job setting up Flask and running your test application! Before we go further, let's take a minute to describe our application's functionality
- our application has access to the system's locale date/time (python's datetime module)
- our application displays a greeting based on the time of day (conditional statements)
- our application displays the day, date, month, year and time in a defined manner (dictionaries)
- our application is able to render user defined variables on
/user/*var*(dynamic components)
The key to writing applications that are easy to maintain is to write clean and well-structured code. The obvious task is to generate a response to a request. This is enough for the simple requests but in many cases, a request also triggers a change in the state of the application and that's where moving the presentation logic into templates help improve the maintainability of the application.
A template is a file that contains the text of a response, with placeholder variables for the dynamic parts that will be known only in the context of a request. The process that replaces the variables with actual values and returns a final response string is called rendering. For the task of rendering templates, Flask uses a powerful template engine called Jinja2
Let's consider a template that implements the response returned by a user() view function that has a dynamic component, which is represented by a variable
<h1>Hello, {{ name }}!</h1>
Rendering templates
By default, Flask looks for templates in a templates subdirectory located inside the main applicaiton directory. Create a templates subdirectory and store the templates defined in the previous examples in it as index.html and user.html respectively The view functions in the application need to be modified to render these templates as such:
from flask import Flask, render_template
...
@app.route('/')
def index():
    return render_template('index.html')

@app.route('/user/<name>')
def user(name):
    return render_template('user.html', name=name)
The render_template() function provided by Flask integrates the Jinja2 template engine with the application. The function takes the filename of the application as its first argument, any additional arguments are key-value pairs that represent actual values for variables referenced in the template
Variables
The {{ name }} construct used in the template above references a variable, a special placeholder that tells the template engine that the value that goes in that place should be obtained from data provided at the time the template is rendered.
Jinja2 recognizes variables of any type, even complex types such as lists, dictionaries, and objects
The following are some more examples of variables used in templates:
<p>A value from a dictionary: {{ mydict['key'] }}.</p>
<p>A value from a list: {{ mylist[3] }}.</p>
<p>A value from a list, with a variable index: {{ mylist[myintvar] }}.</p>
<p>A value from an object's method: {{ myobj.somemethod() }}.</p>
Control Structures
Jinja2 offers several control structures that can be used to alter the flow of the template. The following example shows how conditional statements can be entered in a template:
{% if user %}
    Hello, {{ user }}!
{% else %}
    Hello, Stranger!
{% endif %}
Another common need in templates is to render a list of elements. Here's how this can be done using a for loop:
<ul>
    {% for comment in comments %}
        <li>{{ comment }}</li>
    {% endfor %}
</ul>
Jinja2 also supports macros and template inheritance, which are similar to functions and class inheritance in Python code respectively. We'd look at these in future blogs
GETTING OUR HANDS DIRTY
Before we get started building our webapp, let's take a moment to think about the functionality.
We want to be able to be able to display Good *x*! where x could be morning, afternoon
or evening depending on the time of day
Let's set up a skeleton for our app.py
from flask import Flask, render_template
import datetime

app = Flask(__name__)
@app.route('/')
def index():
    return render_template('index.html')

if __name__ == '__main__':
    app.run(debug=True)
And our templates/index.html like so:
<!DOCTYPE html>
<html lang="en">
<head>
  <meta charset="UTF-8">
  <meta http-equiv="X-UA-Compatible" content="IE=edge">
  <meta name="viewport" content="width=device-width, initial-scale=1.0">
  <title>Simple app</title>
</head>
<body>

</body>
</html>
If you're on VS Code, you can easily get a boilerplate by typing !. Thanks to Emmet.
Running the web app would just display an empty page with a title of "Simple app"
To get our dynamic greeting functionality, we'd be employing the use of conditional statements. So let's grab the value of our hour variable from python's datetime module and get to work:
...
import datetime
app = Flask(__name__)
hour = datetime.datetime.now().hour

@app.route('/')
def index():
    return render_template('index.html', hour=hour)
...
What this is doing is fetch the current hour from Python's datetime module and then parse it to be rendered on the frontend. To get this displaying on our page:
...
<body>
    <p>{{ hour }}</p>
</body>
</html>
We don't just want to display the current hour on the screen though, we want to dynamically generate content based on it's value. To do that, let's throw in a bit of conditional statements in our HTML file
...
  <body>
    <h1>
      {% if (hour >= 0 and hour < 12) %} Good morning {{name|capitalize}}! {%
      elif (hour >= 12 and hour <= 17) %} Good afternoon {{name|capitalize}}! {%
      elif (hour > 17 and hour <= 23) %} Good evening {{name|capitalize}}! {%
      endif %}
    </h1>
</body>
What this does is check the value of the hour variable for different ranges and then display the appropriate message. Running our web app:
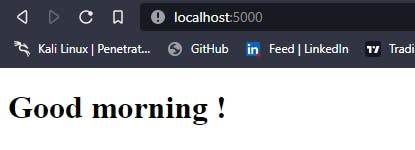
Congratulations on your first dynamic piece of code, now let's get to working on displaying the day, date, month, year and current time in a dynamic manner
Back to our app.py:
...
@app.route('/')
def index():
    hour = datetime.datetime.now().hour
    minute = datetime.datetime.now().minute
    second = datetime.datetime.now().second
    day = datetime.datetime.now().isoweekday()
    month = datetime.datetime.now().month
    date = datetime.datetime.now().day
    year = datetime.datetime.now().year
    current = datetime.datetime.now().year
    return render_template('index.html', hour=hour, current=current, day=day, date=date, month=month,
    days=days, months=months, year=year, minute=minute, second=second)
...
What this does is get the various values we're interested in and then passing it to the frontend. The placeholder for these values in our index.html file would look like so:
...
  <body>
    <h1>
      {% if (hour >= 0 and hour < 12) %} Good morning {{name|capitalize}}! {%
      elif (hour >= 12 and hour <= 17) %} Good afternoon {{name|capitalize}}! {%
      elif (hour > 17 and hour <= 23) %} Good evening {{name|capitalize}}! {%
      endif %}
    </h1>
    <p>{{day}}, {{date}}th of {{month}} {{year}}</p>
    <p>{{hour}}:{{minute}}:{{second}}</p>
  </body>
Running the above code:
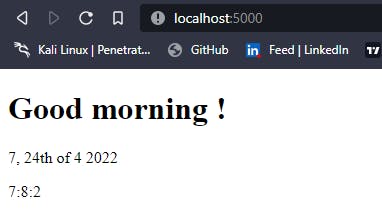
Awesome, our app is slowly taking form!
But then, I'm sure you've noticed some issues, we're seeing 7 instead of Sunday and 4 instead of April. To fix this, we would be employing the use of dictionaries to map the numeric keys to their respective values. In our app.py, this would look like so:
days = {1:'Monday', 2: 'Tuesday', 3: 'Wednesday', 4: 'Thursday', 5: 'Friday', 6: 'Saturday', 7: 'Sunday'}
months = {
 1: 'January',
 2: 'February',
 3: 'March',
 4: 'April',
 5: 'May',
 6: 'June',
 7: 'July',
 8: 'August',
 9: 'September',
 10: 'October',
 11: 'November',
 12: 'December'
}
Nice, we've mapped the keys to their respective values. Now heading back to our index.html file, let's access the dictionaries' values using the key obtained from our module. This would work as follows:
...
    <p>{{days[day]}}, {{date}}th of {{months[month]}} {{year}}</p>
    <p>{{hour}}:{{minute}}:{{second}}</p>
...
Visualizing our new changes:
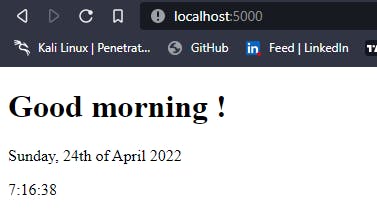
Perfect, you should be proud of yourself :-)!
You must have noticed, we hardcoded the value for th in 24th. That's all good until the new month and our code reads - 1th of May 😂
To fix that, we'd write a function that dynamically generates the suffix based on the current date. Our function would look like so:
def foo(date):
    date_suffix = ["th", "st", "nd", "rd"]

    if date % 10 in [1, 2, 3] and date not in [11, 12, 13]:
        return date_suffix[date % 10]
    else:
        return date_suffix[0]

suffix = foo(date)
...
return render_template('index.html', hour=hour, current=current, day=day, date=date, month=month, days=days, months=months, year=year, minute=minute, second=second, suffix=suffix)
We then invoke the function and set it to a variable suffix which is then passed to the frontend. Our new index.html should also reflect these changes:
...
<p>{{days[day]}}, {{date}}{{suffix}} of {{months[month]}} {{year}}</p>
    <p>{{hour}}:{{minute}}:{{second}}</p>
...
Phew 😰, we're finally done. One more thing though, let's apply a bit of styling to make it look more interesting, or don't you think? 🌚
To apply CSS files to our app, Flask looks in a special directory called static. So create this directory and add your CSS file in it, also the image for the project which can be accessed in this GitHub repository.
To get Flask to access our files though, we need to import one more module from flask
from flask import Flask, render_template, url_for
Next, add the following code to the head of our index.html to link to the CSS.
...
    <link
      rel="stylesheet"
      href="{{ url_for('static', filename='style.css') }}"
    />
...
Adding a bit of styling to your CSS file
body {
  height: 100%;
  background-color: rgb(86, 81, 81);
  background-image: url(./hero-bcg.jpeg);
  background-position: center;
  background-repeat: no-repeat;
  background-size: cover;
  position: relative;
}
h1 {
  text-align: center;
  font-size: 5rem;
  font-family: 'Times New Roman', Times, serif;
  color: rgb(255, 255, 255);
  padding: auto;
}
p {
  text-align: center;
  font-size: 1.2rem;
  color: rgb(229, 218, 218);
  font-weight: 400;
}
Save the app.py and navigate to your browser

I'm sure you agree that this looks so much better 😍😍🔥. We'll look at setting up the dynamic component in the next blog, I believe this is enough for the day (take some time to digest them :-))
Additional resources
🔗 Check out Flask's official documentation: https://flask.palletsprojects.com/en/2.1.x/
🔗 Reading- Flask Web Development: Developing Web Applications with Python
Thank you for reading my post. If you are interested, here is a link to my other blog:
🕸 How the web works
Lastly, I have summarized the code snippets we learned today in this GitHub repository.
Finally, the outro! It was a real long one to lay the foundations, thanks for stopping by to read and I hope you enjoyed reading just as much I enjoyed writing it. Unto the next one! 🥂